7 Tips for Choosing the Best Damask Labels
A garment label may be small, but its texture and finish can shape how a product feels in a customer’s hands. Damask Labels are valued for their fine woven detail, smooth surface, and ability to show small text clearly. Still, appearance alone is not enough. A label must also suit the garment, remain comfortable against skin, and hold up to regular wear and washing.
Start by considering where the label will be placed and how it will feel when worn. Neck labels may need softer edges, while hem labels can often accommodate more detail. Check the weave, color contrast, size, fold, and attachment method against your design. Ask suppliers about material options, minimum order quantities, and care performance, then review a physical sample before approving production. Screen images can hide rough edges or make colors look different. Details matter.
The right choice balances brand presentation with practical needs, including readability, comfort, and budget. Compare quotes carefully; a lower unit price may not include setup or finishing costs. This guide shares seven tips for evaluating those factors and communicating your requirements clearly. Not every recommendation will fit every product, so treat the sample as a useful check—not a guarantee of long-term performance. A little testing can prevent a lot of rework.
Understanding Damask Labels and Their Common Uses
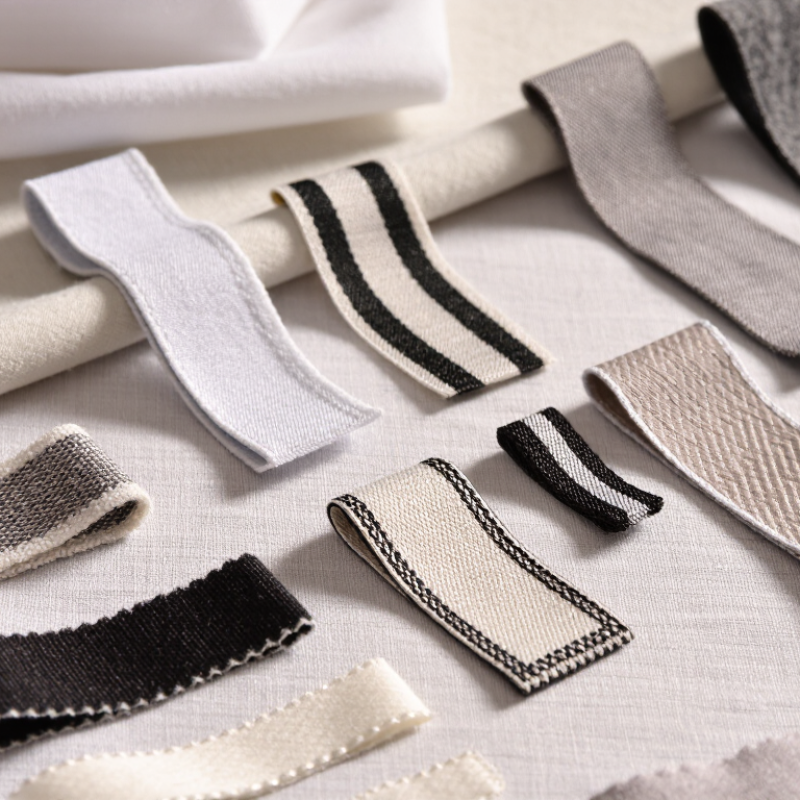
Damask labels are woven labels, not simply printed fabric tags. Their patterns form through contrasting yarns, which creates a slightly textured surface and clear detail. The term can cover different weave densities and finishes, so labels may feel soft, crisp, or firm. That texture matters. On a shirt’s neckline, a smooth finish can feel more comfortable against skin. On a bag or cushion, a sturdier label may better handle frequent handling.
These labels commonly identify clothing, accessories, towels, and home textiles. They can display a maker’s name, garment size, care details, or a small decorative motif. Fine lettering is possible, but tiny text may become difficult to read when the label is narrow. Check a sample under ordinary indoor light, then touch and fold it as the finished item will be used. A label sewn inside a jacket faces different wear than one attached to a decorative pillow. Not always, though: more texture does not automatically mean greater durability. Yarn choice, weave, edges, and sewing method all influence how a label holds up. One detail is easy to overlook: a beautiful design can still feel scratchy where it touches skin.
7 Tips for Choosing the Best Damask Labels - Understanding Damask Labels and Their Common Uses | Tip | What to Check | Common Uses | Practical Consideration |
| 1. Understand the woven construction | Damask labels are woven from threads, allowing text and simple artwork to form part of the label rather than being printed only on its surface. | Branding and information labels on garments, bags, hats, and home textiles. | Woven detail can suit designs that need to remain legible through regular handling and laundering. |
| 2. Match detail to label size | Review the smallest lettering, fine lines, and any compact symbols at the intended finished dimensions. | Neck labels, hem tabs, side-seam labels, and small accessories. | Very small text or intricate artwork may be harder to read when woven at a reduced size; simplify the design if needed. |
| 3. Choose a suitable weave density | Ask for a sample to assess how clearly the design appears and how the label feels. Weave density and thread choice can affect both appearance and hand feel. | Everyday apparel as well as products where a refined woven appearance is desired. | Compare samples with the actual artwork and label dimensions rather than relying on a digital preview alone. |
| 4. Select the right edge finish | Common options include folded ends, center folds, end folds, and flat-cut edges. The appropriate finish depends on how the label will be attached. | Folded labels are often sewn into seams; flat labels can be sewn around their edges or attached at selected points. | Confirm the finished size after folding and allow enough space for the sewing area. |
| 5. Plan how the label will be attached | Decide whether it will be sewn into a seam, stitched onto a surface, or attached using another method suited to the product. | Clothing interiors, bags, soft accessories, and textile products. | For washable items, sewn attachment is commonly used. Check the product construction and care requirements before choosing a method. |
| 6. Consider comfort and placement | Check the label's width, folded edges, texture, and position against the area where it will be worn or handled. | Neck labels, waist labels, and labels on items that contact skin. | A sample sewn into the intended location can help reveal irritation, bulk, or interference with seams. |
| 7. Check care and production requirements | Confirm that the label material and construction suit the expected washing, drying, and use conditions. Review color, dimensions, and finish on a production sample. | Washable clothing, bedding, towels, and other frequently handled textile goods. | Care performance depends on the full label construction and attachment. Test a representative sample with the product's care routine. |
Defining Your Label’s Material and Finish Requirements
Start with the label’s actual job. A soft neck label needs a different feel from a durable outerwear tag. Damask is woven, so fine lettering and small symbols can appear crisp, but very dense designs may feel stiffer against skin. Ask for a material sample and rub it between your fingers. Touch it first. Check how the yarn feels, whether the edges scratch, and whether the text stays readable at the intended size. Polyester yarn is common for woven labels because it can hold detail and handle repeated wear, though the best choice depends on the garment and care routine.
The finish matters just as much as the fiber. A satin-like surface can look smooth and refined, while a flatter weave may suit a practical, understated label. Folded ends can reduce fraying and improve comfort; an unfinished cut edge may be suitable when the label is stitched into a seam. Think about washing, heat, friction, and skin contact. Request a sample sewn into a similar fabric, then inspect it after several wash cycles. Color can shift slightly under different lighting, and a finish that looks elegant on a desk may feel rough after a full day of wear. I have found that small test runs reveal problems, but they do not always predict every production batch. Keep the specification clear, including fiber, fold, edge treatment, and care conditions.
Assessing Design, Color, and Print Quality
A damask label is judged at close range, not only on a screen. Check whether the lettering stays legible when woven with fine yarns, and whether small symbols keep their shape. Grand View Research estimated the global labels market at US$48.8 billion in 2023. That crowded market makes clear design choices important, though size alone does not guarantee quality.
Compare thread colors under neutral daylight and warm indoor lighting. A shade that looks crisp on a monitor may appear dull beside a garment’s fabric. Request a physical sample, then check contrast, sheen, and how the colors shift when the label bends. Keep the palette restrained; too many similar shades can blur fine details. I have sometimes trusted digital proofs too quickly. They can flatter a color.
Inspect the edges of letters and the reverse side for loose threads or uneven density. If the label includes printed details, examine a magnified sample for fuzzy lines, gaps, and inconsistent ink coverage. Ask the supplier how color consistency is checked between production runs. ISO 12647 provides process-control guidance for print reproduction, but woven labels also depend on yarn, loom settings, and weave structure. A perfect file is not a perfect label. Get approval on the actual material before ordering.
Comparing Adhesion, Durability, and Application Needs
Damask labels often combine a textured face with fine lettering, so adhesive choice affects both appearance and performance. A strong permanent adhesive may hold well on glass but tear delicate paper during repositioning. A removable option may lift at a jar’s curved edge. Test the label on the actual container, not just a smooth sample. Press it down, leave it for a day, then check the corners.
Application conditions matter. Cold glass, condensation, dusty surfaces, and hand-applied labels can all reduce contact. For refrigerated products, test labels after chilling and wiping the container. For boxes or dry goods, rub the label gently to check whether the texture or printed detail scuffs. ASTM D3330 provides a standard method for measuring peel adhesion, but real packaging trials reveal factors a test panel may miss.
Durability depends on the whole setting, not just the adhesive. FINAT’s 2024 European market data reported that self-adhesive label-material demand fell 4.7% in 2023, to about 8.1 billion square metres. That broad market figure reflects varied uses; it cannot predict how one Damask label will perform. Match the face stock and adhesive to moisture, handling, and storage time. I still find edge lift easy to overlook. Check it under ordinary use.
Choosing a Supplier and Confirming Product Specifications
A dependable damask-label supplier should explain the fabric, weaving method, and production limits clearly. Request a physical sample before approving an order. Inspect it under natural light and indoor lighting; small lettering can blur when the weave is too dense. A polished product photo is not enough. Small details matter.
Confirm the fiber content, label dimensions, fold style, and finished-edge requirements in writing. Ask for the permitted size tolerance, since a few millimeters can affect how a label sits inside a garment. Check that the colors match an approved physical swatch, not only a screen image. If labels will be washed, request relevant care and colorfastness information. A useful safeguard.
Ask how the supplier handles revisions, rejects, and repeat orders. Request a production proof showing the final artwork, placement, and dimensions before bulk production begins. Keep the approved sample and specification sheet together, so later batches can be compared against them. No checklist catches every flaw; a small trial order may reveal issues that a sample cannot. If an answer about materials or tolerances feels vague, pause and ask for a clearer specification.